How to Freeze Fish: Tips to Prevent Freezer Burn

If you’ve ever come home from a fishing trip with more fresh fish than you can eat in a day or two, you know the struggle. Learning how to freeze fish properly is one of the most valuable skills an angler can have.
The good news? Freezing fresh fish is simple when you know what you’re doing. With the right method and a little prep, you can enjoy delicious frozen fish all year long without any freezer burn or loss of quality.
Why Proper Freezing Matters for Fresh Fish
Fresh fish is delicate. Exposure to cold air, ice crystals, and fluctuating temperatures can quickly destroy the texture and flavor of fish flesh. The goal when you freeze fish is to protect it from moisture loss and oxidation. Both of these things can cause freezer burn.
Whether you caught a beautiful walleye on the lake, grabbed some lake trout from a local fishing hole, or picked up fresh seafood from the grocery store, the same principles apply. The best way to preserve the quality of any type of fish is to freeze it quickly, with as little air exposure as possible.
What You Need to Freeze Fish
Before you get started, gather your supplies. Having everything ready makes the process quick and efficient.
- Fresh fish or fish fillets (freshwater fish, fatty fish, large fish — any type works)
- Paper towels
- Plastic wrap, freezer paper, aluminum foil, or moisture-vapor resistant paper (for traditional wrapping)
- Freezer bags or vacuum bags (for the water or vacuum method)
- A vacuum sealer (optional but highly recommended)
- Permanent marker for labeling
- Cold water or near-freezing ice water (for the ice glaze method)
- Ascorbic acid solution (optional, to prevent discoloration in fatty fish)
The Best Methods to Freeze Fresh Fish
There are several ways to freeze fish at home. The best method for you depends on what equipment you have and the type of fish you’re working with. Here’s a breakdown of each approach.
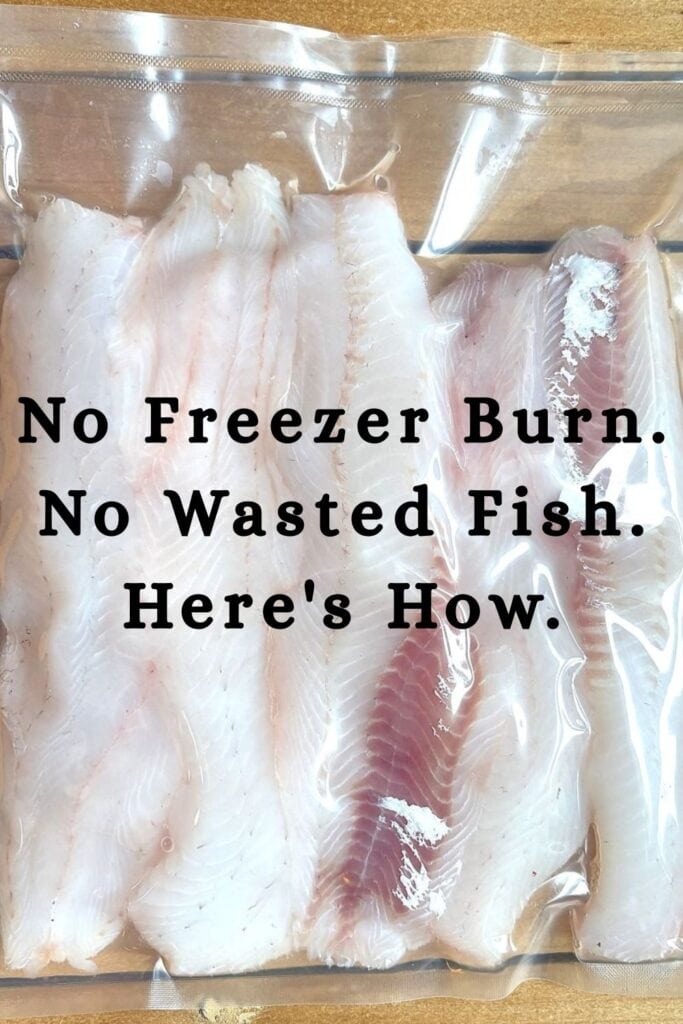
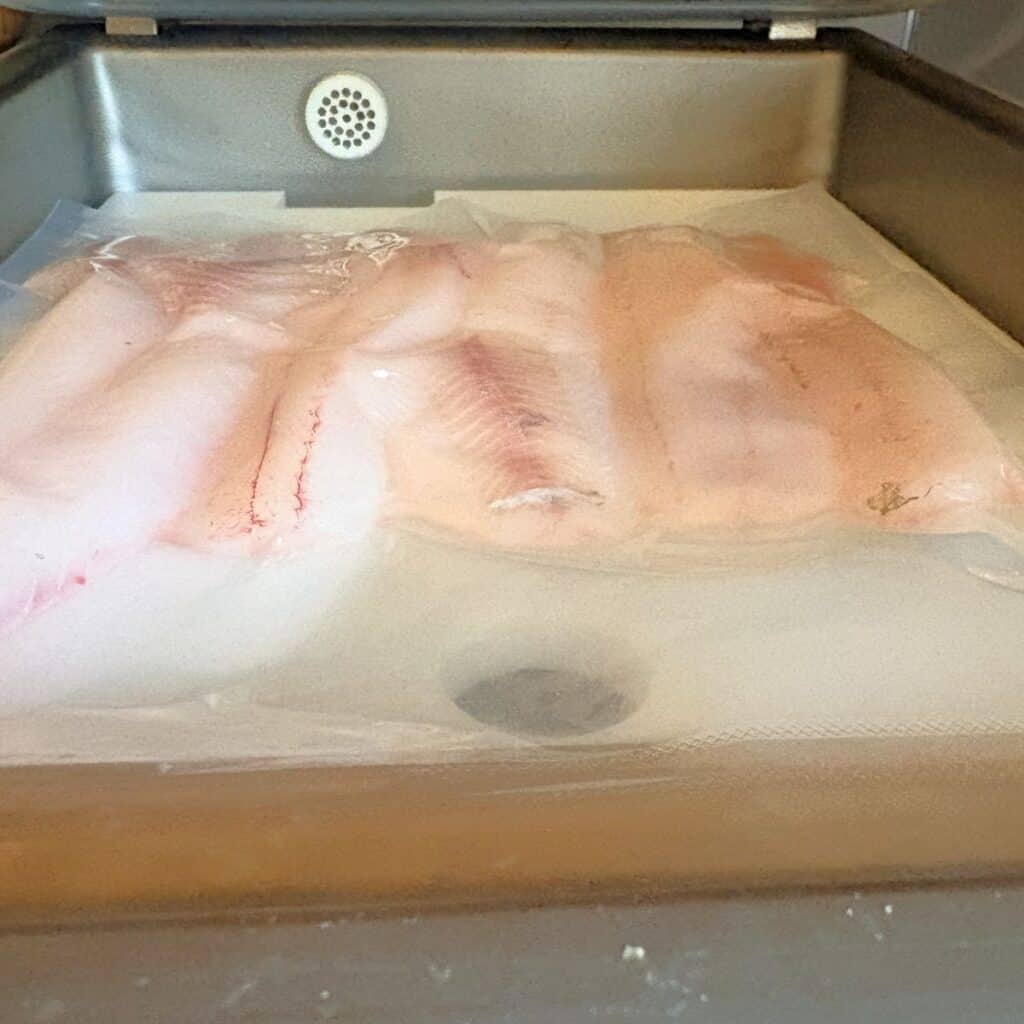
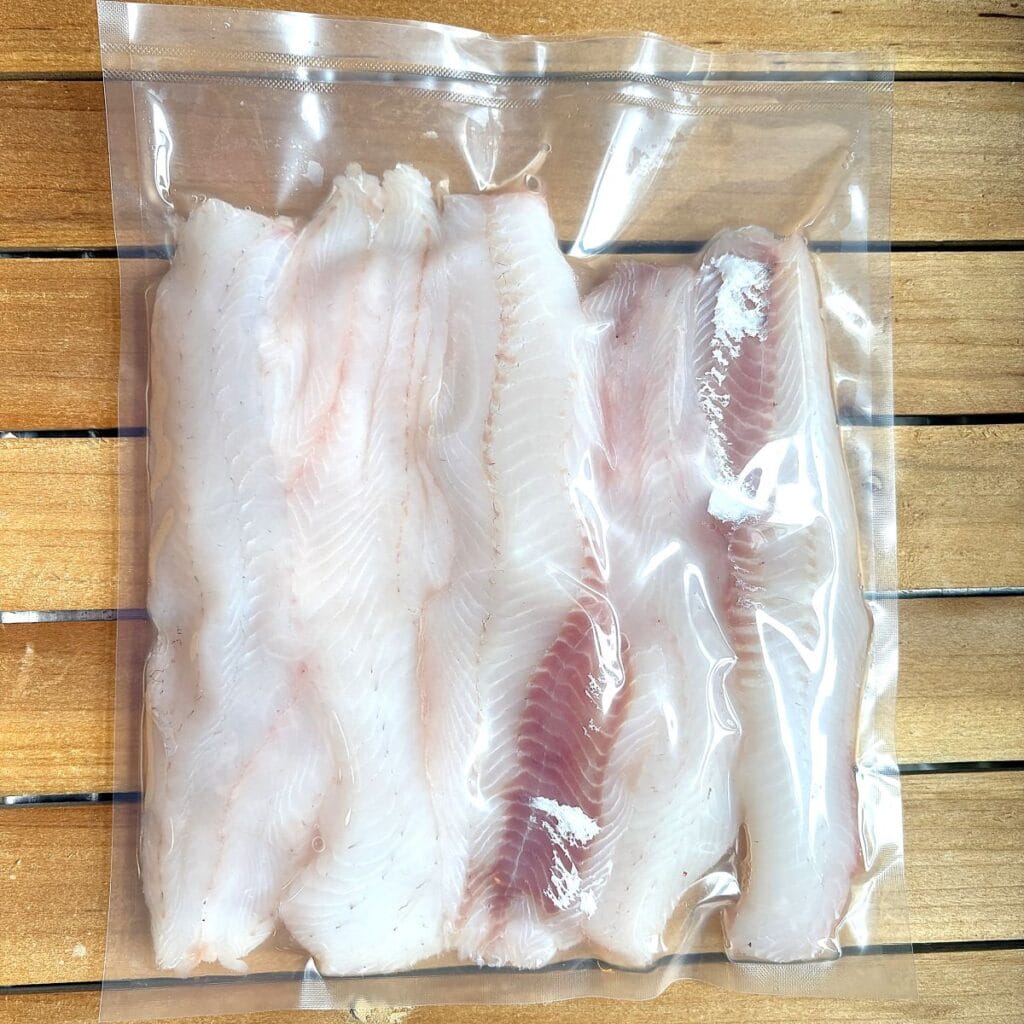
Method 1: Vacuum Sealing (Best Results)
Vacuum sealing is, without question, the best way to freeze fish for long-term storage. A vacuum sealer removes nearly all the air from vacuum bags before sealing, which dramatically reduces the chance of freezer burn and extends storage time significantly.
Here’s how to do it:
- Pat fish fillets dry with a paper towel. Removing surface moisture leads to better results.
- Place fish in individual portions in vacuum bags. Freezing in individual portions makes it easy to thaw only what you need.
- Run the bags through your vacuum sealer according to the manufacturer’s instructions.
- Label with the date, type of fish, and weight.
- Place flat in the freezer until frozen solid.
Vacuum sealed fish stored at 0°F can maintain excellent quality for up to 12 months for lean fish, and 6–9 months for fattier fish like lake trout. This is the method I personally use for all my walleye and other freshwater fish.
Method 2: The Ice Glaze Method
The ice glaze method is an old-school, highly effective technique used by commercial fisheries. It creates a uniform cover of ice around the fish, which protects it from cold air exposure. This is especially great for whole fish or larger fish.
Here’s how to do it:
- Place fresh fish on a baking sheet lined with parchment paper and freeze until solid.
- Remove frozen fish from the freezer and dip fish quickly in near-freezing ice water.
- Return to the freezer for a few minutes to let the ice glaze set.
- Repeat — dip fish in cold water and refreeze — until you’ve built up a uniform cover of ice around the entire fish.
- Wrap the ice-glazed fish in freezer paper or plastic wrap, then place in a freezer bag.
This easy method is particularly effective for whole fish and works beautifully when you don’t have a vacuum sealer on hand.
Method 3: Traditional Wrapping
Traditional wrapping is the easiest method and requires no special equipment. It works best for short-term frozen storage (up to 3 months). Proper wrapping means eliminating as much air as possible from around the fish.
Here’s how to do it:
- Pat fish fillets dry with a paper towel.
- Wrap each piece tightly in plastic wrap, pressing out as much air as you can.
- Add a second layer of moisture-vapor resistant paper — freezer paper works great, as does aluminum foil or butcher paper.
- Place wrapped fish in a freezer bag and squeeze out any remaining air before sealing.
- Label with the date and type of fish and place in the coldest part of your freezer.
A nice thing about this method is that it requires nothing beyond what most people already have in their kitchen.
Method 4: The Water Method (Freezer Bag Method)
This is another easy method that works well for fish fillets and requires no special equipment. The little water in the bag acts as a barrier between the fish and the cold air.
Here’s how to do it:
- Place clean fish fillets in a freezer bag.
- Add just enough cold water to cover the fish — a little water goes a long way.
- Gently press out any excess air from the top of the fish and around the bag.
- Seal the bag tightly and lay flat in the freezer.
This water method is simple and effective for short to medium-term storage. It’s a great option for freshwater fish like walleye when you want a quick, no-fuss solution.
Tips for Freezing Fatty Fish vs. Lean Fish
The type of fish you’re working with affects how long it will store well.
Lean fish (walleye, perch, bass, crappie) keep well for up to 9–12 months when vacuum sealed and stored properly.
Fatty fish (lake trout, salmon, whitefish) have a higher fat content, which means they’re more prone to oxidation. Plan to use fatty fish within 3–6 months for best results. An ascorbic acid solution dip before freezing can help slow oxidation and preserve color and flavor in fat fish.
Avoiding Freezer Burn
Freezer burn happens when ice crystals form on the surface of frozen fish and moisture evaporates into the cold air of your freezer. It shows up as dry, grayish patches on the fish flesh. While freezer burned fish is still technically safe to eat, the quality suffers significantly.
The best way to prevent freezer burn is simple: eliminate as much air as possible before freezing. Whether you’re using vacuum sealing, the water method, or traditional wrapping, the goal is always the same — no air, no problem.
Keeping your freezer at a consistent 0°F (not fluctuating) also helps prevent ice crystals from forming and re-forming over time.
How Long Does Frozen Fish Last?
Storage time depends on the method you use and the type of fish:
- Vacuum sealed: Lean fish up to 12 months; fatty fish 6–9 months
- Ice glazed: Up to 6 months
- Water method or traditional wrap: 3–6 months for best quality
Always label your packages with the date and type of fish so you know exactly what you have for future use.
How to Thaw Fish Safely
Knowing how to thaw fish is just as important as knowing how to freeze it. Never thaw fish at room temperature — this is a food safety risk.
The best way to thaw fish is in the refrigerator overnight. For a faster method, place vacuum sealed or well-wrapped frozen fish in a bowl of cold water. Change the cold running water every 30 minutes until the fish is thawed. This water method typically takes about an hour for individual portions.
You can also thaw fish in the microwave oven using the defrost setting, but this method can begin to cook the edges of the fish if you’re not careful. Use it only when you need to thaw fish quickly and plan to cook it immediately.
Never refreeze previously frozen fish that has been fully thawed. Once you thaw fish, cook it within 1–2 days.
Once your fish is thawed and ready to cook, these [Fish Tacos with Homemade Fish Taco Sauce] are one of our favorite ways to use fresh-caught walleye, perch, or bluegill.
A Note on Walleye, Perch, Pike, and Other Freshwater Fish
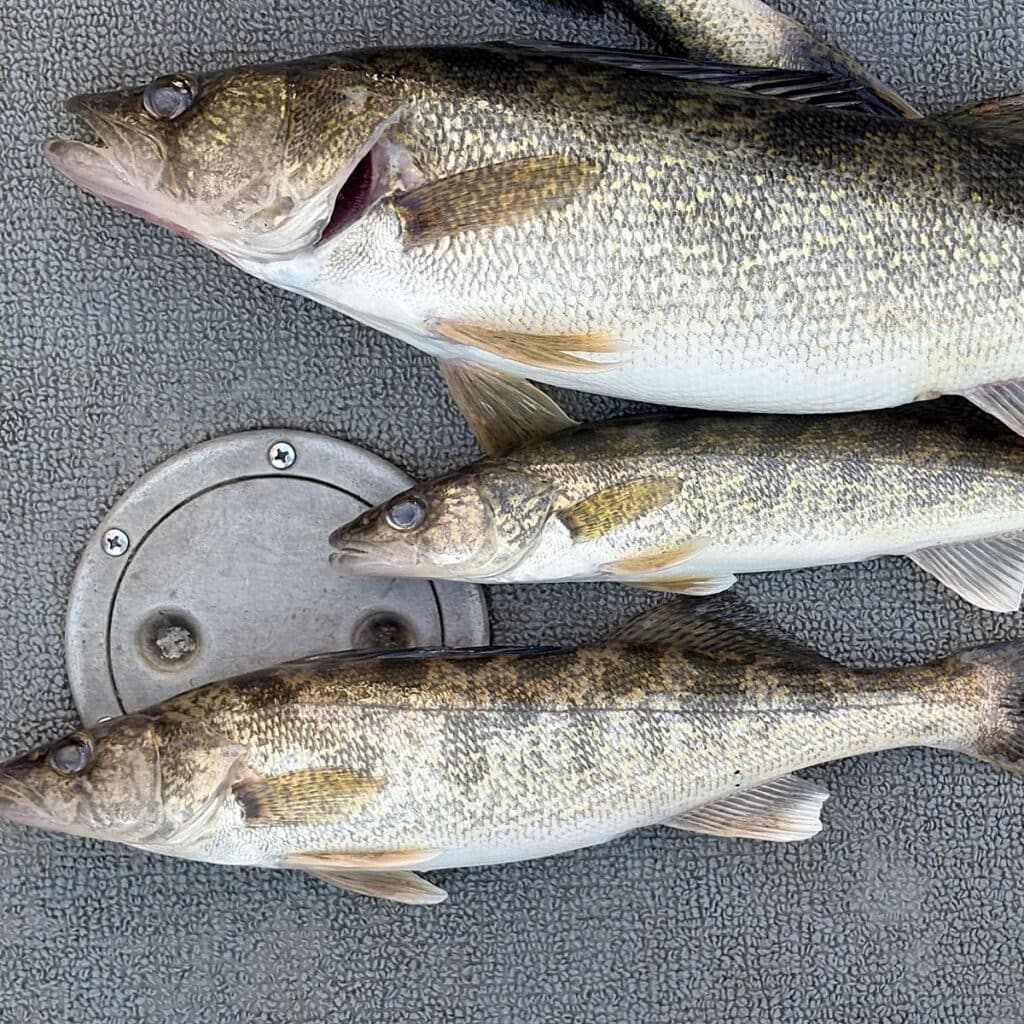
Walleye is one of the best freshwater fish for freezing because it’s a lean, mild-flavored fish that holds up beautifully in the freezer. I clean and fillet walleye immediately after catching and get it on ice or into the freezer as quickly as possible for the best results.
Vacuum sealing walleye in individual portions is my favorite approach. This method makes weeknight dinners so easy to pull together, and the fish tastes just as good as the day it was caught.
Whether you’re working with walleye, perch, bass, lake trout, or any other freshwater fish, the methods above will serve you well next time you come home with a great catch.
Summary: Best Practices for Freezing Fish
- Clean fish immediately and keep it cold until ready to freeze
- Pat dry with paper towels before wrapping or sealing
- Use a vacuum sealer and vacuum bags whenever possible for best results
- Eliminate as much air as possible with any method
- Label with date and type of fish
- Freeze as quickly as possible at 0°F
- Thaw in the refrigerator or in cold water — never at room temperature
- Use within the recommended storage time for each type of fish
The next time you head home from a successful fishing trip, you’ll know exactly what to do. Freezing fresh fish properly means you’ll be pulling beautiful, delicious fillets out of your freezer for months to come.
Have questions about freezing fish? Leave a comment below — I’d love to help!

Pin for Later